" 1882
You don’t have to have a lot of fancy equipment to make art. Crystal Bridges’ Museum Educator Moira Anderson demonstrated this recently in an Art by the Glass workshop titled “Intergalactic Kitchen Prints,” in which they used some everyday household items to create their own prints, inspired by the lithographs of Étienne Léopold Trouvelot, in Crystal Bridges’ permanent collection.
Trouvelot was an artist and astronomer who lived in France and the United States between 1827 and 1895. He began making drawings of the astronomical objects he observed through his 6-inch telescope in 1870, and these were so masterfully created that Trouvelot was invited to make observations and drawings from Harvard College Observatory’s 15-inch Great Refractor, and later from the 26-inch Great Equatoria at the US Naval Observatory. Over his lifetime, Trouvelot created thousands of astronomical drawings.
For the 1876 Centennial Exhibition in Philadelphia, Trouvelot created a set of large color pastel images, some of which he later converted to lithographs to be published by Scrivners and Sons. The resulting collection, comprising 15 stunningly detailed and nuanced chromolithographs, along with a manual describing the prints, was published in 1882 as The Trouvelot Astronomical Drawings. Only about 300 of these sets were produced, and Crystal Bridges is fortunate to have one of these in our permanent collection.

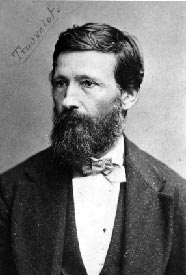
Étienne Léopold Trouvelot, 1827 – 1895
“Mare Humorum,” 1882, Chromolithograph. Image courtesy the New York Public Library Digital Collections.
Over the past few months, the Museum has been exhibiting a rotating selection of Trouvelot’s prints in our Colonial to Early Nineteenth-Century Gallery. Because they are light-sensitive works on paper, they cannot remain on display for an extended period. Monday, March 7, is the last day to view them before they are returned to the vault. If you miss them, however, you can view all 15 of Trouvelot’s lithographs in the Digital Collections of the New York Public Library.

Étienne Léopold Trouvelot, 1827 – 1895
“Solar Protuberances,” 1882, Chromolithograph. Image courtesy the New York Public Library.
Oh, one other thing about Trouvelot— in addition to his prints, he is known, rather ignominiously, for introducing the invasive and highly destructive European Gypsy Moth to North America. Before he got into astronomy, Trouvelot had a passing fascination with entomology—in particular, silk moths, which he hoped to breed and profit from in the United States. He brought a batch of eggs to the US from Europe and started raising them under nets in the woods behind his house near Boston, Massachusetts. Inevitably, some escaped. Trouvelot alerted regional entomologists, but nothing was done about the invasion until it was too late. Today the Gypsy Moth continues to be a scourge on deciduous trees across the country, with particular concentrations here in the Ozarks, as well as the Appalachian region and around the Great Lakes.

Diane Carroll creates a kitchen print in Crystal Bridges’ Art by the Glass workshop.
But back to our original subject: Making prints with everyday stuff: in this case, heavy-duty aluminum foil, Coke or other cola, a Sharpie pen, and a brayer. This is a fun take on the harsh process of traditional lithography, though it’s a bit tricky and may require some trial and error before you get the hang of it.
But what’s so special about Lithography? Here are the basics of the traditional methods: The printing is made from a stone (litho = stone) or a metal plate with a smooth surface. The artist first draws an image onto the surface with an oil- or wax-based material (like a litho crayon). The stone is then treated with a mixture of sulphuric acid and gum arabic, etching the portions of the stone that were not protected by the waxy drawing. Then comes the water: to print, the stone is moistened, and the etched areas retain water. When applying an oil-based ink over the stone, the areas retaining water repel the ink so that it only sticks to the image. Put a piece of paper in contact with the surface, and print!
This traditional technique is still used today, but we’re here to bring you a safer version. The basic science of lithography remains the same: oil and water do not mix, and acid will create the image. Please note that there are several methods of “kitchen lithography” out there, but Moira Anderson takes us through the process she found to work best, step by step, throwing in a little clarity on the magic happening as we go.
Materials you will need:

- Heavy-duty aluminum foil (It has to be heavy duty)
- Fresh cola (it loses its effectiveness if it’s been opened for more than a few minutes, so don’t open it until you need it!)
- A Sharpie pen – any size, or a variety!
- Oil-based etching ink (this won’t work with paint, water-based ink, or other oil-based printing ink. Trust us; it has to be etching ink!)
- Latex gloves (they keep you from staining your hands, but you also want to keep your fingerprints off the foil)
- Steel wool or steel scouring pad
- Vegetable oil
- A cookie sheet with a rim
- A paper plate
- A small brayer
- A spray bottle of water
- Watercolor paper
- Masking tape
- LOTS of paper towels
- A couple sponges
- A large spoon
- A small bowl of water

- First things first – Let’s prep! Put on some gloves. The aluminum foil will pick up even the slightest traces of oil, so your fingerprints will show up on the final print if you touch it with your bare hands.
- Scoop about half a tablespoon of ink into the paper plate with a plastic knife. Using a brayer, roll it out to a smooth, even layer. You don’t want it to be goopy—a little goes a long way! Set it aside until you’re ready to print.
- Tear a sheet of aluminum foil smaller than the size of the cookie sheet. Try to keep it as smooth as possible. Lay your aluminum foil the on the cookie sheet, shiny side up, and tape the edges down with masking tape so it won’t move around while you work.
- Use the steel scrubby to gently rough up the surface of the foil where you plan to draw your image: the texture helps the sharpie adhere to the foil, creating a better resist.
- Draw you image on the foil with a sharpie: simple lines and shapes work best (in our case, stars, planets, and galaxies were the theme).
- This is where it gets cool: open your cola and pour it over the image. Let it stand for a minute or two. The phosphoric acid in the cola etches around the lines of your drawing into the foil.
- Lightly rinse your etched foil sheet in the sink, just enough to get the cola off (leave it taped to the cookie sheet while you do this.)
- Now, pour a little vegetable oil on the surface of the foil and buff it in gently using a clean sponge. You may start to see the Sharpie marks coming up: that’s fine, don’t sweat it. This is also the equivalent to oiling your stone so the water pools in the etched area (you won’t really see it, but it’s happening!).
- Dip your sponge in clean water and brush it over the surface. You want the foil to be wet…but not too wet. Just damp. You may have to work a bit to figure out perfect amount.
- Now roll the inked brayer over the image, then wipe the foil again with the wet sponge and repeat. You want to make at least three passes with the ink, and keep wiping the surface with the wet sponge in-between charges. If the surface does not have enough water on it, the ink will roll up your whole image. When the ratio is perfect, only the image will pick up the ink and you will get a crisp print (this takes some practice—there are artists who really work at this, so don’t get discouraged!).
 Lightly mist a sheet of watercolor paper with the spray bottle (again: not too much, not too little, think Goldilocks here) press it over the foil, and smooth it out. The back side of a large spoon is a good tool for this.
- Gently lift your print off the foil and admire it! You can make multiple prints from one foil “plate.”
- If you want to add color, you can use watercolors, pencils, paint, whatever you like. If you’re feeling really confident, you could even try making multiple prints in different colors on the same paper, adding one color at a time, as in chromolithography.

Let us know how it works out! Here are some examples of finished prints from the Art by the Glass workshop: 